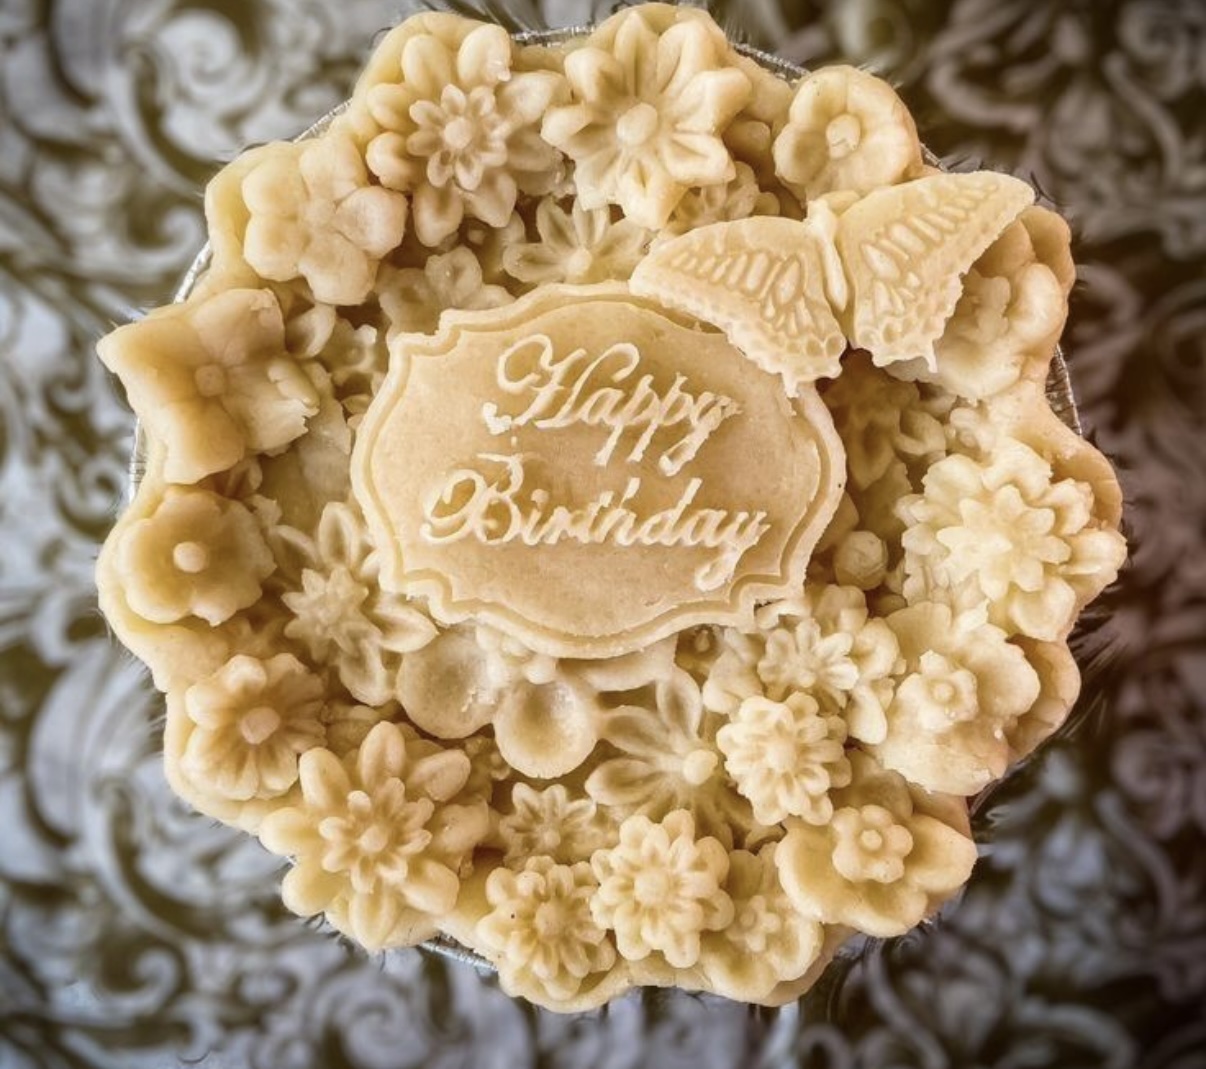
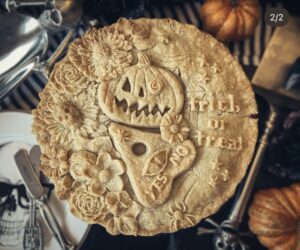
Shortbread Recipe

This is an easy delicious buttery shortbread cookie that is made with three basic ingredients – flour, butter and sugar. The baked cookies are tender and they absolutely won’t spread.
With our quick & easy shortbread recipe, you’ll be turning out incredible designs in minutes.
Ingredients
- 114 grams granulated sugar
- 227 grams unsalted butter, room temperature
- 1/2 teaspoon kosher salt
- 340 grams plain flour
Instructions
-
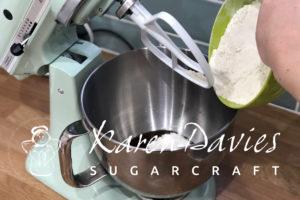
Place the sugar, butter, and salt in the bowl of a stand mixer with the paddle attachment and mix on medium speed until the mixture is smooth, about 2 minutes.
-
Stop the mixer, scrape down the bowl and add all the flour at once. Turn the mixer to low speed and mix until all the flour is just combined. The dough will be crumbly at this point. Increase the mixer speed to medium and mix until the dough has completely come together.
-
Turn the cookie dough out onto a lightly floured surface.
-
Use your hands to knead the dough into a ball. Do not use too much flour.
-
Dust your mould with plain flower and press your dough into the mould until flat at the back and tear away any excess. Turn your mould over and carefully feel back to release. Place the cookies on a parchment-lined board or cookie sheet.
-
Chill the dough in the refrigerator for at least 20 minutes. Chilling the dough will help the cookies hold their shape while baking.
-
While the cookies are in the refrigerator preheat the oven to 150 degrees c.
-
Line a half baking sheet with parchment paper. Place cookies on the baking sheet evenly spaced apart.
-
Bake the cookies for 18-22 minutes.
-
Take the cookies out of the oven and allow them to cool for about 5 minutes on the cookie sheet before moving them to a cookie rack to completely cool.
-
If you’re using the same baking sheet for the next batch of cookies let it cool completely before placing the next set of cookies on the baking sheet.
-
The shortbread cookies can be stored in an airtight container for up to 2 weeks.

- Published in Recipes
Short Crust Pastry Recipe
This season, give your bakes the wow-factor with our silicone moulds — perfect for pastry!
With our quick & easy shortncrust pastry recipe, you’ll be turning out incredible designs in minutes.


The base of many good recipes start with the most simple of ingredients. We love short crust pastry as it is super simple to prepare, freezable and can form the base of many different recipes.
It takes just minutes, and you can save around 60-70%, at least, compared to buying it ready made in the supermarket. I always find it surprising just how easy short crust pastry is to make! And what makes it even better? It’s mouldable! You can wow your family, friends and guests with pies and pastries like they’ve never seen before!
Ingredients
- 140g butter
- 280g plain flour
- 30ml of water
Instructions
- Sift your flour to remove any lumps. Add a pinch of salt.
- Add the butter to the flour and rub together with your fingertips to achieve a breadcrumb style consistency.
- Add your water, 5-10ml at a time, until you have formed the dough into a ball. Depending on the humidity conditions in your kitchen you may need a little more water than this recipe states, so this is why it is best to add gradually until you’ve formed a ball of dough.
- Ensure the dough is not sticky while you’re combining it together. If it is too sticky then add a small dusting of plain flour.
- Wrap your ball of dough in cling film and chill in the fridge for 30 – 45 minutes.
- Your easy shortcrust pastry dough is now ready to mould and bake!
- Published in Recipes
Rolled Buttercream Recipe
The game changer that is rolled buttercream (or butterpaste as we like to call it)!
We are loving making cakes and using our moulds with this beautiful recipe.
It’s so easy to use and tastes delicious, just like buttercream.
It’s more stable than normal buttercream and so you don’t have to stress so much about your decorations melting or sweating in warmer weather!
It dries with an outer crust but remains beautifully soft to eat on the inside. And it’s perfect for covering cakes with, no elephant skin!
We could go on and on about how much we love it but you just need to try it for yourself!!
Ingredients
- 125g unsalted butter
- 125ml corn syrup
- 500g icing sugar (plus 300g-500g for kneading)
Instructions
- Cream your butter for 10 minutes until pale and fluffy
- Slowly mix in your corn syrup
- Slowly add in 500g of icing sugar until a sticky dough is formed.
- Knead your buttercream into extra icing sugar on your work surface until a smooth ‘dough’ forms (this part is honestly so therapeutic, it’s beautifully smooth!)
- You will know that your buttercream is ready when it’s no longer sticky and is beautifully smooth and pliable
- Colour with food colouring (gel or oil based).
- If covering a cake with rolled buttercream, crumbcoat your cake first for your rolled buttercream to adhere to.
- To mould, simply dust your mould with cornflour and press your buttercream firmly in. Peel back to release. Attach to your cakes using normal buttercream or edible glue.
- Published in Recipes
Custard Cream Recipe
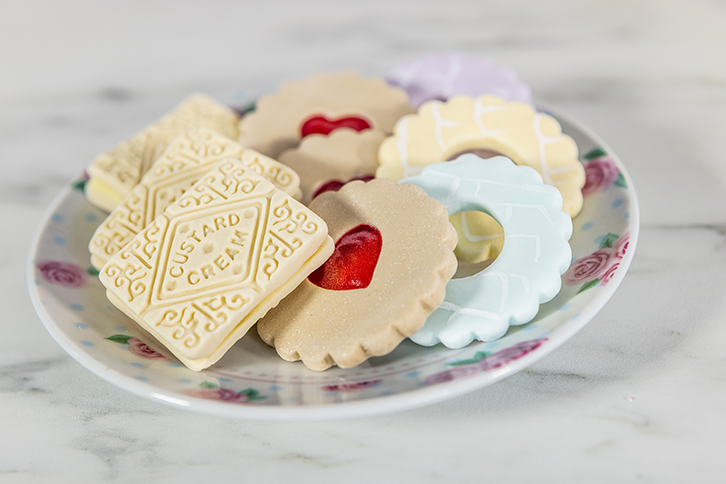
The perfect addition to any English garden party! A custard cream!
Follow our recipe below and use with our Afternoon Tea Mould to create your own custard creams!
Prep Time 45 minutes
Cook Time 6 – 9 minutes
Ingredients
For the biscuits:
- 225 g soft butter
- 115 g sugar
- 1 tbsp vanilla extract or vanilla flavouring if you don’t have extract
- 3 tbsp milk
- 340 g plain flour sieved
- 125 g instant custard powder
For the filling:
- 300 g icing sugar
- 150 g softened butter
- 2 tbsp instant custard powder
- 2 tsp vanilla extract again use vanilla flavouring if you don’t have extract
Instructions
- Cream together the butter and sugar until they are fully mixed together.
- Mix in the vanilla extract and milk.
- Add the sieved flour and custard powder.
- Mix this all together until the ingredients produce a smooth dough.
- Flatten the dough and wrap it in cling film. Place into your fridge for about 20 mins to firm up – this makes it easier to mould the biscuits.
- Preheat your oven to gas mark 4, 180ºC, fan 160ºC.
- Dust the mould with cornflour and tap out the excess. Press small pieces of dough – approximately 10g, into the mould. Remove and place on a baking tray lined with baking paper.
- Bake in the oven and check regularly on them as they can burn quickly. You want them to be a light golden brown – this should take between six and nine minutes depending on your oven.
- Remove the biscuits from the baking tray and leave to cool on a wire rack.
- Whilst the biscuits are cooling, you can make the filling.
- Cream together the icing sugar, butter, custard powder and vanilla extract until smooth. Once the biscuits are cool, spoon a teaspoon of the filling onto a slice of biscuit and then top with another biscuit slice.
- Repeat until all your biscuits are filled full of custardy tasting deliciousness and then serve. Keep the biscuits in an air-tight container, as they will go soft if you don’t, and they should keep for a few days.
- Published in Recipes
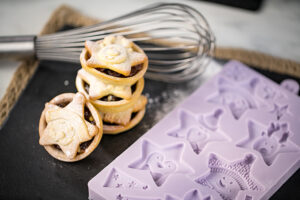
Mince Pies Recipe
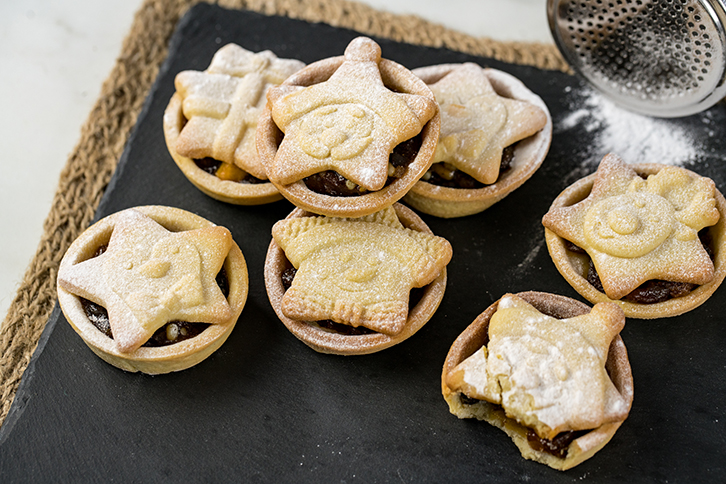
There’s nothing better than sitting down with a cup of tea and warm mince pie on a cold Winter’s day. Our beautiful mince pies are super easy to make and will make anyone smile over the festive season!
All you need is our no spread short-crust pastry recipe, a jar of mincemeat and one of our Christmas moulds!
Short-crust pastry recipe
Ingredients
230g (8oz) plain flour
125g (4 1/2oz) cold unsalted butter, cut into 1cm cubes
50g (1 3/4oz) icing sugar
1 egg yolk
2 tablespoons milk (for egg wash)
boiling water
- Place the flour and butter into the bowl or a freestanding mizer and attach the paddle beater. Mix on a medium speed until the butter has been incorporated into the flour and resembles fine breadcrumbs. Add the icing sugar and mix for a few seconds before adding the egg yolk and milk. Continue to mix until a cohesive dough forms.
- Turn out the pastry onto a work surface and bring it together with your hands, without overworking it.
- Lay out a long sheet of cling film and place the dough on one half. Flatten the pastry with the palms of your hands, then fold the remaining cling film over the top, fully encasing the dough. Roll out swiftly between the cling film to an approximate depth of 5mm, trying your best to keep it in a circular shape.
- Place in the fridge for at least an hour before using.
- After resting, roll out on to your work surface, dust lightly with plain flour if needed.
- Use 8cm round cutter to cut bases for your mince pies.
- Place in a lightly greased tin and prick base with a fork.
- Add a 15ml tablespoon of mincemeat to each base
- Bake for 8-10 minutes at 190c/gas mark 5/375f
- Dust your chosen mould with plain flour, tap out any excess. Work and soften your pastry before pressing firmly into your mould. Mould as you would do with sugarpaste or cookie dough.
- Turn out on to a lined baking tray.
- You can also use our larger border moulds to mould a large border of pastry then use cookie cutters to cut out individual mince pies toppers.
- Bake for 8-10 minutes at 190c/gas mark 5/375f
- Place your baked toppers on top of your pies.
- They look beautiful left plain, dusted with a little icing sugar or you can finish by spraying with PME edible pearl lustre or brushing in places with a little edible glue then sprinkling over Magic Sparkles.
- Published in Recipes
Karen Davies Cookie Craft – Top Tips For Cookies That Won’t Spread
Our Cookie Craft recipes are guaranteed not to spread but here we share with you some further tips to make sure that you get perfect cookies every time..
- Chill your dough – Chilling cookie dough will help to prevent spreading. For best results chill the cookie dough overnight. After chilling, let your cookie dough come to room temperature before moulding and baking otherwise your dough will be too solid to mould.
- Line your baking tray – Use baking paper or a silicone baking mat. Don’t use a nonstick spray or butter as this will cause your cookies to become greasy and spread.
- Ouch that’s hot! – If baking your cookies in batches, don’t put your next batch onto a hot baking tray. Use another tray or wait for your tray to cool and always use a new piece of baking paper or allow your silicone mat to cool down before moulding your next batch of dough.
- Butter, butter, butter – When butter is too warm, it is too soft. When butter is too soft, your cookies will spread all over the baking sheets. You want your butter to be room temperature. When you press it, your finger will make an indent. Your finger won’t sink down into the butter, nor will your finger slide all around.
- Correctly measure your flour – Cookies spread because the fat in the cookie dough melts in the oven. If there isn’t enough flour to hold that melted fat, the cookies will over-spread. Spoon and level your flour or, better yet, weigh your flour. If your cookies are still spreading, add an extra 2 tablespoons of flour to the cookie dough.
- Don’t over mix your dough – Don’t leave your dough unattended mixing away in your mixer while you get on with tidying up. Beating too much air into your dough can cause your cookies to collapse.
- One batch at a time, on the middle rack – This is how to get the best possible results.
- Freeze – Once you have moulded your dough, you can put your designs in the freezer for 10 minutes whilst your wait for your oven to warm up. Your dough may have become warm from the heat of your hands whilst moulding.
Ready, set, bake!
- Published in Recipes
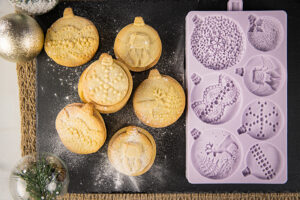
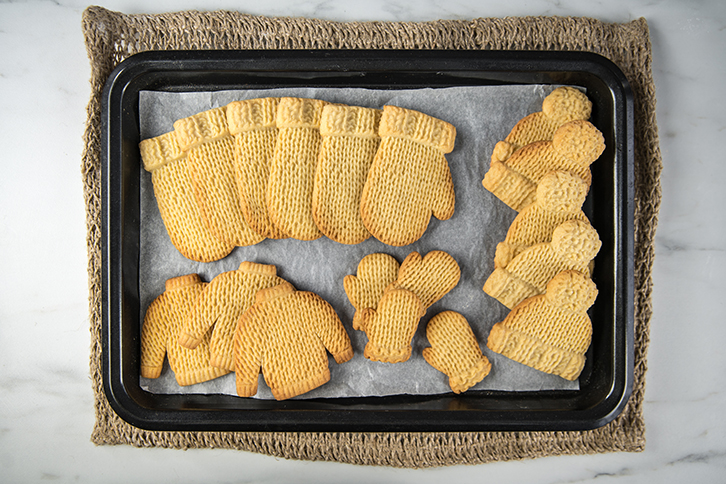
Karen Davies Cookie Craft – Gingerbread Recipe

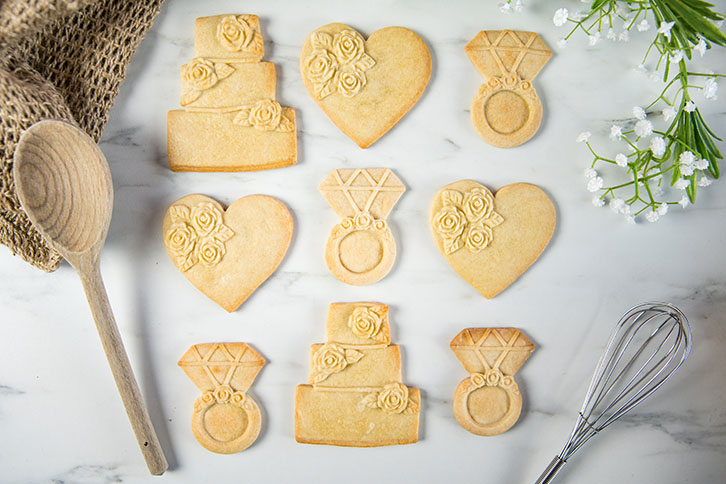
We often make cookies using our moulds. They are perfect for Christmas tree decorations, baby showers, gifts and wedding favours. They are also delicious!
The secret to creating perfect moulded cookies is to use a dough that won’t spread..
Here we share with you our perfect gingerbread recipe..

Perfect Gingerbread Recipe
- 75g light brown soft sugar
- 2 tablespoons golden syrup
- 1 tablespoon black treacle (this can be substituted for a tbsp. of golden syrup to make your gingerbread lighter)
- 1 tablespoon water
- 1 teaspoon ground cinnamon
- 1 rounded teaspoon ground ginger
- A pinch of cloves
- 95g unsalted butter
- 250g plain flour sifted, plus a little more (if needed).
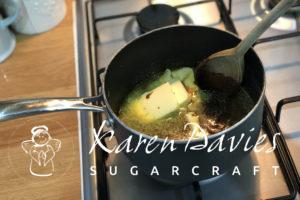
Method
1. Put the sugar, syrup, (treacle), water, and spices together in a large saucepan.
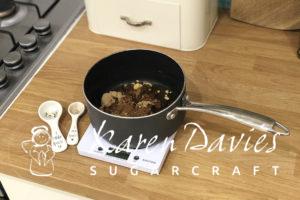
2. Bring them to boiling point, stirring all the time. Remove the pan from the heat and stir in the butter until melted.
3. Next, stir in the flour gradually until you have a smooth dough – add a little more flour if you think it needs it. Knead your dough and then leave it covered in a cool place to become firm (approximately 30 minutes).
4. Pre-heat the oven to 180°C, gas mark 4.
If you’re not immediately making the cookies, wrap the dough in plastic wrap and refrigerate (or freeze) until you are ready to use it. Before using, bring to room temperature.
Now you are ready to mould and decorate!
How To Mould And Bake
As a general rule of thumb, we suggest that you follow the moulding instructions that come with your mould. Otherwise, please follow the steps below..
- Dust your mould with Plain Flour or Cornflour and tap out any excess.
- Take some of your cookie dough and roll into a smooth ball. Press the smoothest side down into your mould. Use your fingers to push the dough into the mould until it is flat on the back and up to all of the edges. Use your thumb to tear away any excess. If using one of our larger moulds, you can roll your dough into the mould using a rolling pin.
*Top Tip* If you would like to bake your cookies onto lollipop sticks, now is the time to attach them! With your dough still in the mould – place the top of your stick about half way up the back of the moulded item. Take a small piece of spare cookie dough and press over the back of the stick so you can no longer see it. This will secure your stick into your dough. *Please note* Lollipop sticks can only be added to items that are complete once turned out of the mould. If you plan on cutting your moulded item with a shaped cutter afterwards, you will distort the shape.
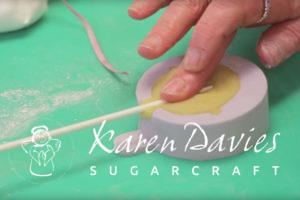
3. Turn your mould over and slowly peel the mould back until you see the dough start to fall out. Keep pulling back slowly so as not to tear any thinner details.
4. Place on a baking tray lined with baking paper (you may have to bake in batches).
5. Each design will vary in cooking time due to their various thicknesses. Smaller items take approx. 8 minutes. Larger items take 10 – 15 minutes. Keep an eye on your oven to prevent anything from burning.
6. Once baked leave them to cool on the baking sheet for a few minutes before transferring them to a wire cooling rack.
7. Cookies can then be decorated with edible powder colours, edible paints, edible glitter and/or royal icing!


Ready, set, bake!
- Published in Recipes
Karen Davies Cookie Craft – Sugar Cookie Recipe
We often make cookies using our moulds. They are perfect for Christmas tree decorations, baby showers, gifts and wedding favours. They are also delicious!
The secret to creating perfect moulded cookies is to use a dough that won’t spread..
Here we share with you our perfect sugar cookie recipe..
Perfect Sugar Cookie Recipe
- 75g caster sugar
- 3 tablespoons golden syrup
- 1 tablespoon water
- 95g unsalted butter
- 260g plain flour sifted, plus a little more (if needed)
Optional Flavours
- For vanilla cookies, add seeds from 1 vanilla pod
- For lemon cookies, add finely grated zest of 1 lemon
- For orange cookies, add finely grated zest of 1 orange
- For chocolate cookies, replace 50g of the plain flour with 50g cocoa powder
Method
- Put the sugar, syrup, water, and any zest flavouring or vanilla seeds together in a large saucepan.
- Bring them to boiling point, stirring all the time. Remove the pan from the heat and stir in the butter until melted.
- Next, stir in the flour gradually until you have a smooth dough (remember to substitute 50g of flour for 50g of cocoa powder if making chocolate cookies) – add a little more flour if you think it needs it. Knead your dough and then leave it covered in a cool place to become firm (approximately 30 minutes).
- Pre-heat the oven to 180°C, gas mark 4.
- If you’re not immediately making cookies, wrap the dough in plastic wrap and refrigerate (or freeze) until you are ready to use it. Before using, bring to room temperature.

How To Mould And Bake
As a general rule of thumb, we suggest that you follow the moulding instructions that come with your mould. Otherwise, please follow the steps below..
- Dust your mould with Plain Flour or Cornflour and tap out any excess.
- Take some of your cookie dough and roll into a smooth ball. Press the smoothest side down into your mould. Use your fingers to push the dough into the mould until it is flat on the back and up to all of the edges. Use your thumb to tear away any excess. If using one of our larger moulds, you can roll your dough into the mould using a rolling pin.
*Top Tip* If you would like to bake your cookies onto lollipop sticks, now is the time to attach them! With your dough still in the mould – place the top of your stick about half way up the back of the moulded item. Take a small piece of spare cookie dough and press over the back of the stick so you can no longer see it. This will secure your stick into your dough. *Please note* Lollipop sticks can only be added to items that are complete once turned out of the mould. If you plan on cutting your moulded item with a shaped cutter afterwards, you will distort the shape.
3. Turn your mould over and slowly peel the mould back until you see the dough start to fall out. Keep pulling back slowly so as not to tear any thinner details.
4. Place on a baking tray lined with baking paper (you may have to bake in batches).
5. Each design will vary in cooking time due to their various thicknesses. Smaller items take approx. 8 minutes. Larger items take 10 – 15 minutes. Keep an eye on your oven to prevent anything from burning.
6. Once baked leave them to cool on the baking sheet for a few minutes before transferring them to a wire cooling rack.
7. Cookies can then be decorated with edible powder colours, edible paints, edible glitter and/or royal icing!
Ready, set, bake!
- Published in Recipes